CX Accounts & Users
If your CX Portals requires a login, control access by adding approved accounts and it's users.
For details on your current setup or to modify attributes, contact your Enablix CSM or support help@enablix.com.
CX Accounts
Your customer or partner accounts. In CX Accounts > CX Accounts tab, you can:
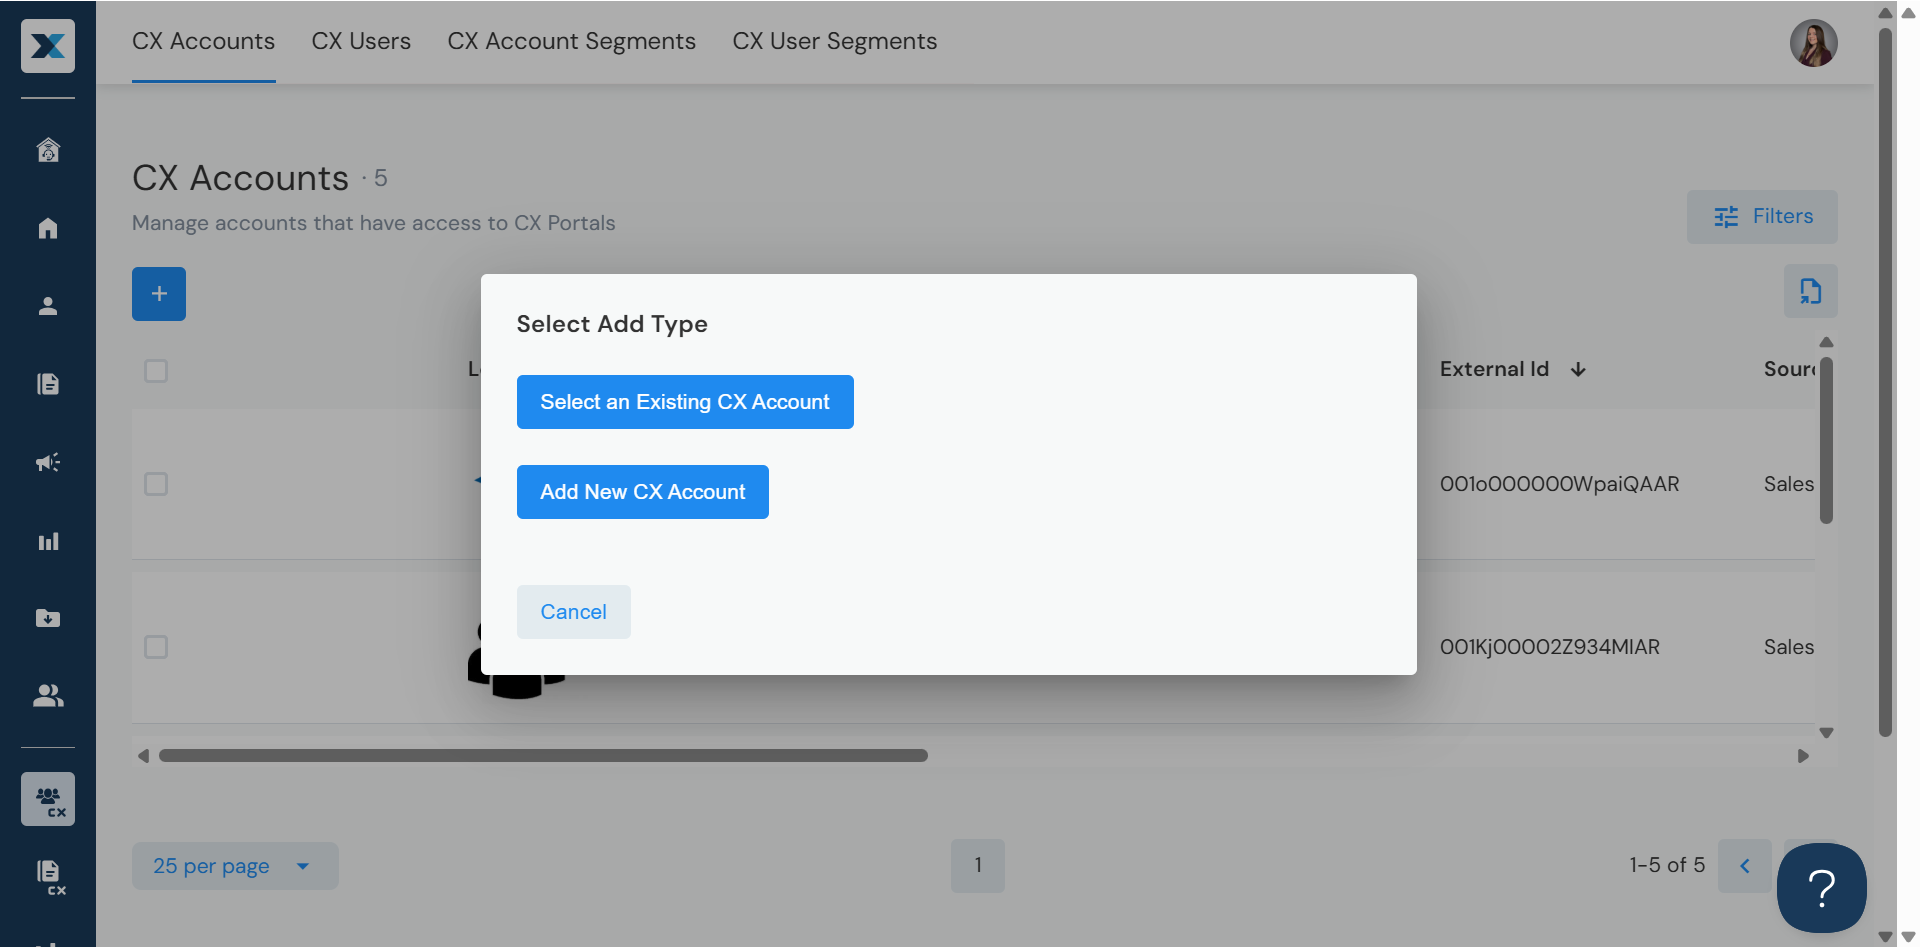
- Add a CX Account by selecting one of two options:
- Select an Existing CX Account Add an account from your synced database (if applicable) or re-add a previously added account
- Add New CX Account Manually add a new account
- Modify a CX Account by clicking the account name, making your changes, then clicking Save
- Delete a CX Account by clicking the account name, unchecking CX Account, then clicking Save
CX Users
Your customer or partner users. In CX Accounts > CX Users tab, you can:
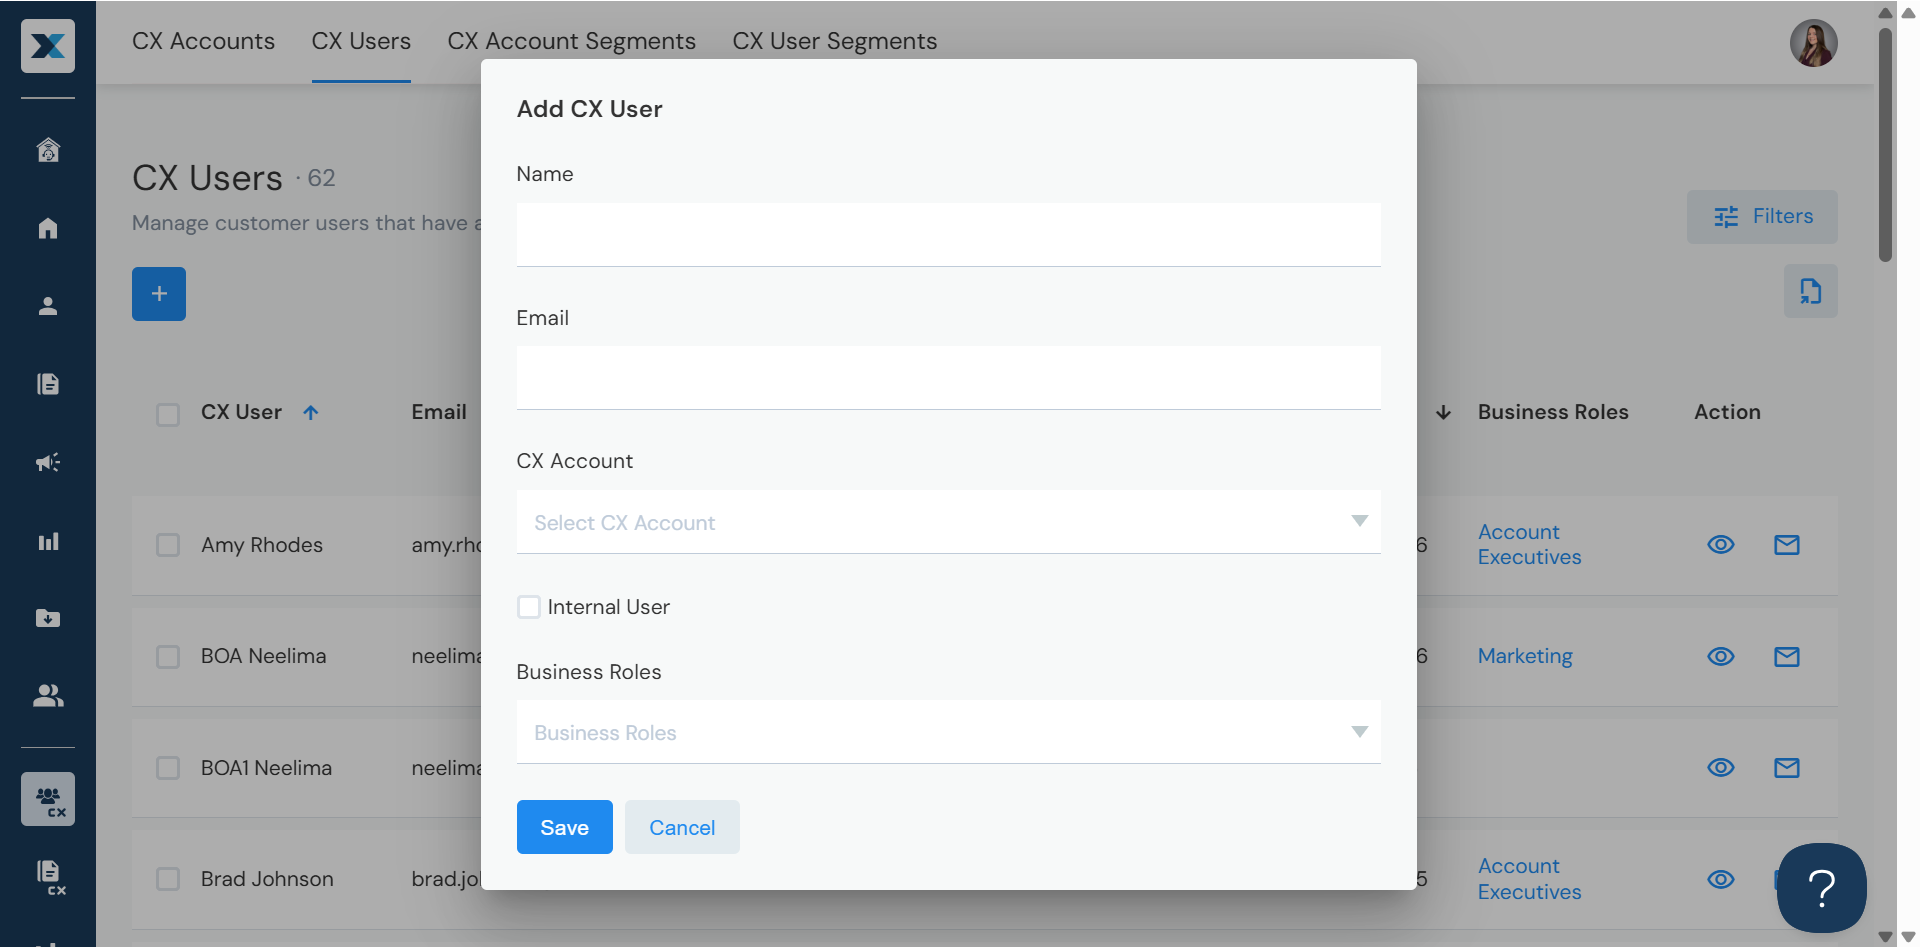
- Add a CX User by clicking the blue plus sign
- Depending on your setup, this may trigger a welcome email
- Modify a CX User by clicking the user's name, making your changes, then clicking Save
- Delete a CX User by clicking the account name, unchecking CX User then clicking Save
Enablix supports multiple ways to add CX Users, including manual entry and self-registration.
CX Attributes
Attributes are:
- Account- or user-based
- Customizable to your business needs (e.g. enterprise, service, region)
- Used for segments or for reporting purposes